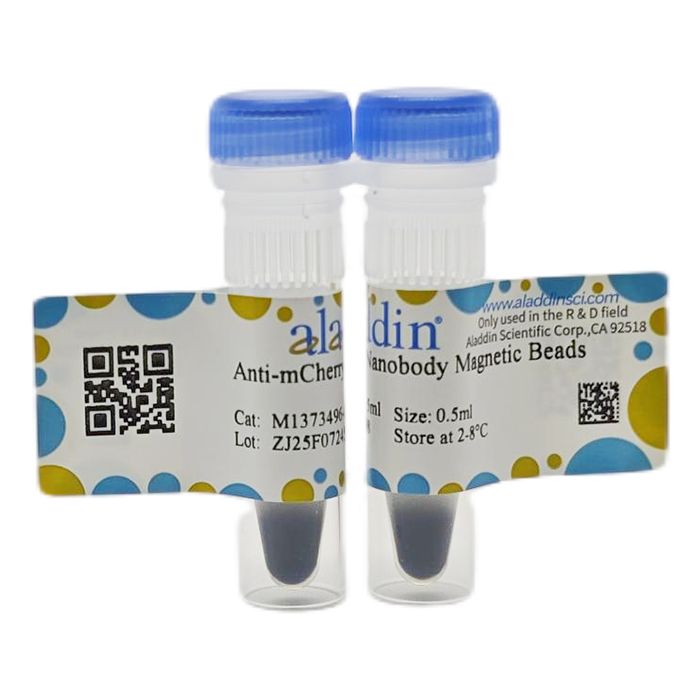
Anti‑RFP Nanobody Magnetic Beads are coupled with a rigorously screened, optimized, and recombinantly expressed RFP nanobody. They can be used to capture RFP‑fusion proteins and their interacting proteins from cell or tissue extracts of various organisms including mammals, plants, bacteria, yeast, and insects.
Before the experiment, express the RFP protein fused to the target protein in cells or tissues. Then add Anti‑RFP Nanobody Magnetic Beads to the sample lysate; the RFP nanobody forms a complex with the target fusion protein and its binding partners. After removing unbound proteins, the proteins can be eluted by various methods, and the IP eluate will not be contaminated by antibody light or heavy chains.
Product Characteristics
Bead diameter
| 10–30 µm (magnetic agarose beads)
|
Protein binding capacity
| ≥1.5 mg protein / mL beads
|
Reactivity
| Specifically binds to various common types of RFP proteins (mRFP, mCherry, mRFPruby, mRuby2, tagRFP, mKate2, mPlum, mOrange, PA‑mCherry, mScarlet). Recognizes RFP tags at either the N‑ or C‑terminus of fusion proteins.
|
Applications
| Immunoprecipitation (IP), Co‑immunoprecipitation (Co‑IP), Chromatin Immunoprecipitation (ChIP), RNA‑Binding Protein Immunoprecipitation (RIP)
|
Storage buffer
| 20 mM PBS, 5% BSA
|
Storage conditions
| 4℃. Do not freeze. |
Product Advantages
1. Nanobody – no light/heavy chain contamination. Whether using native or denaturing elution, the IP complex will not show contamination from antibody light or heavy chains.
2. High affinity. Nanomolar‑level affinity allows easy handling of low‑copy‑number genes or difficult‑to‑transfect cell lines.
3. High binding capacity. Using oriented coupling technology, about 15 µg of recombinant protein can be bound per 10 µL of antibody‑coupled beads.
4. High specificity. The antibody‑coupled beads have been tested with over 10 blank cell lines and show minimal non‑specific adsorption.
5. Excellent compatibility. Recognizes tags at either the N‑ or C‑terminus of the bait protein.
6. Good stability. Passed 40°C high‑temperature testing, tolerates temporary temperature fluctuations during shipping or accidental omission of refrigeration after experiments.
Instructions for Use
1. Required Main Instruments
Magnetic rack, mixer/shaker, refrigerated centrifuge, ultrasonic disruptor.
2. Recommended Buffer Formulations
Buffer
| Formulation
|
Lysis Buffer
| 10 mM Tris‑HCl pH 7.5, 150 mM NaCl, 0.5 mM EDTA, 0.5% NP‑40 (adjust pH at 4°C)
|
Wash Buffer
| 10 mM Tris‑HCl pH 7.5, 150 mM NaCl, 0.5 mM EDTA, 0.05% NP‑40 (adjust pH at 4°C)
|
Elution Buffer
| 200 mM glycine pH 2.5
|
2× SDS‑PAGE Loading Buffer
| 125 mM Tris‑HCl pH 6.8, 4% SDS, 20% glycerol, 0.004% bromophenol blue |
3. Precautions
3.1 Do not dry, freeze, or vortex the beads vigorously. Avoid prolonged placement on a magnetic rack, as this may cause bead aggregation and reduce binding activity.
3.2 To ensure uniform bead distribution, gently vortex or mix by pipetting up and down.
3.3 Before the experiment, add sufficient protease inhibitors to the lysis and wash buffers. For RIP experiments, also add sufficient RNase inhibitors. Mix well and keep on ice; prepare freshly.
3.4 Before IP experiments, confirm the expression level of the bait protein in the sample lysate (input).
3.5 Each IP experiment should include a negative control group, typically using a sample expressing the RFP tag empty vector.
3.6 If the recommended buffer system does not yield satisfactory results, you may screen and prepare your own buffers.
3.7 The specific sample amount and incubation time depend on each particular system and may require optimization for maximum yield.
3.8 When the molecular weight of the fusion protein exceeds 200 kDa, bead‑based IP efficiency may decrease due to steric hindrance, and the bead amount may need to be tested.
3.9 For your safety and health, please wear a lab coat and disposable gloves during operation.
3.10 This product is for scientific research only and must not be used for clinical diagnosis or treatment.
4. Operating Steps
4.1 Sample Lysis (Reference)
(1) Collect samples as follows:
Sample Type
| Amount per Group
| Collection Method
|
Animal cells
| 1 × 10⁷ cells
| Wash 2–3 times with cold PBS, centrifuge at 500 g, 4°C for 5 min each time to collect the pellet; remove liquid as completely as possible.
|
Animal tissue
| 100~200 mg
| Rinse thoroughly with cold PBS or saline to remove blood, etc.; grind thoroughly under liquid nitrogen.
|
Plant tissue
| 200~300 mg
| Wash with sterile double‑distilled water; grind thoroughly under liquid nitrogen.
|
Gram‑negative bacteria
| 50 µL bacterial pellet
| Wash 2–3 times with cold PBS, centrifuge at 5000 g, 4°C for 5 min each time to collect the pellet; remove liquid as completely as possible.
|
(2) Place samples on ice. Add 500 µL of pre‑chilled lysis buffer per group and mix by pipetting.
(3)
a. Animal cells: Preferably sonicate on ice until the solution is essentially clear. If no sonication is available, lyse on ice for 30 min with occasional manual mixing.
b. Animal tissue, plant tissue, microorganisms: Sonicate on ice until the solution is essentially clear.
(4) Centrifuge at 4°C, 12,000 g for 15 min. Transfer the supernatant to a new tube. Take 30 µL as “input”; keep the remainder on ice or store at –80°C.
Notes:
i. If the sample is not completely lysed (solution very turbid), increase the lysis buffer volume, improve the lysis method, or adjust sonication conditions. Optimal sonication conditions vary by sample type and equipment and should be established beforehand.
ii. The lysis buffer volume can be increased proportionally with sample amount, but the total incubation volume should not exceed 2/3 of the tube capacity. For larger volumes, use a larger tube.
4.2 Co‑immunoprecipitation
(1) Gently invert the Anti‑RFP Nanobody Magnetic Beads to mix. Transfer 20 µL of beads per group to a new tube.
(2) Add 200 µL of wash buffer, invert to mix 30 times, place on a magnetic rack for 1 min, and discard the supernatant.
(3) Repeat the previous step once.
(4) Add the corresponding group’s sample lysate to the beads. Incubate on a shaker at 4°C for 3 h to overnight.
(5) Place on a magnetic rack for 1 min and discard the supernatant.
(6) Add 500 µL of wash buffer, invert to mix 30 times, place on a magnetic rack for 1 min, and discard the supernatant.
(7) Repeat the previous step twice, for a total of three washes.
4.3 Elution
(1) SDS‑PAGE loading buffer elution (denaturing elution): Add 50 µL of 1× SDS‑PAGE loading buffer and heat at 95°C for 5–10 min. Place on a magnetic rack for 1 min or centrifuge at 5000 g for 1 min, then transfer the supernatant to a new tube. The eluted proteins can be stored at –20°C or used directly for SDS‑PAGE and Western blotting. SDS‑PAGE gel bands can be used for mass spectrometry.
(2) Glycine elution (native elution): Add 40–50 µL of glycine elution buffer, vortex for 20 s, incubate on a shaker at room temperature for 10–15 min, vortex again for 20 s. Centrifuge at 1000 g for 20 s, place on a magnetic rack for 1 min, and transfer the supernatant to a new tube. The eluted proteins can be stored at –80°C or used directly for SDS‑PAGE, Western blotting, mass spectrometry, etc.
Note: Anti‑RFP Nanobody Magnetic Beads do not suffer from antibody light/heavy chain contamination. Denaturing elution is recommended first, as it provides higher elution efficiency.

 ZJ25F0724597